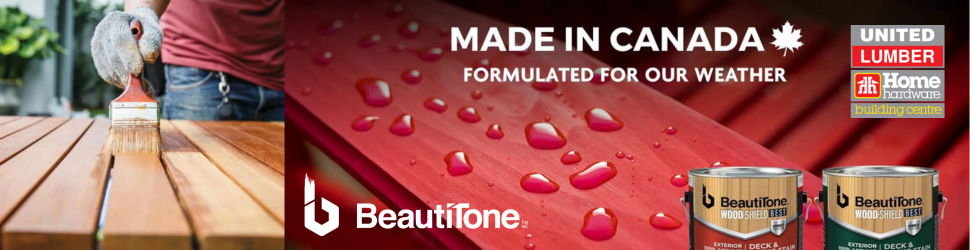
This Barrie 360 content series is brought to you by United Lumber Home Hardware
Your wood deck and fence are not only functional but also add a touch of natural beauty to your outdoor spaces. But because they’re constantly exposed to the elements, they’re incredibly susceptible to wear and tear.
The good news is, there’s an easy way to maintain their aesthetic appeal and prolong their lifespan – staining.
Benefits Of Staining Your Deck And Fence
Staining your deck or fence is a transformative process that not only enhances its natural beauty but also offers a range of practical benefits.

Here are some of the many ways staining your deck or fence can elevate your outdoor living experience.
Protect Against The Elements
As mentioned, decks and fences constantly fight the effects of nature - intense sunlight, heavy rains, and harsh winter conditions.
Staining acts as a protective shield, guarding against moisture, UV rays, and other environmental factors that can cause decay, warping, and discoloration. By forming a durable barrier, staining prolongs the life of these structures, saving you time and money on repairs and replacements in the long run.
Prevent Mold And Mildew
One of the greatest threats to the longevity of decks and fences is the growth of mold and mildew. These unsightly invaders not only tarnish the appearance but also compromise the structural integrity.
Staining with specialized formulas inhibits the growth of these organisms, ensuring a cleaner, healthier, and more attractive outdoor space.
Unleash Its Natural Beauty
Whether you prefer a natural finish that preserves the wood's organic grain or a more vibrant color that complements your overall aesthetic, staining provides countless options to achieve the desired look.
With various opacities available, you can customize the level of transparency, allowing the natural texture to shine through or create a bolder statement.
Increased Property Value
Beyond the personal satisfaction of a beautiful outdoor space, investing in staining also pays off in terms of property value.
Potential buyers are often drawn to well-maintained decks and fences, appreciating the care and attention given to the property. The enhanced appeal and durability can boost your home's overall value and make it more marketable in the future.
Staining your deck and fence is a simple yet powerful way to elevate your outdoor living experience. But to reap the benefits, you need to make sure you do it right.
To help you get a long-lasting high-quality finish, we turned to some local experts to find out exactly what’s involved in staining outdoor wood.
So let’s take a look at some simple tips that will help you successfully stain your wood decks and fences.
RELATED: What you need to know about building a deck ...
7 Tips For Staining Wood Decks And Fences
There are jobs around the house that are better left to professionals, like replacing a breaker panel or making structural upgrades. But there are also many projects that you can do yourself so long as you have the right products, materials, and advice.
We had a chance to chat with Diane Desjardins, the Assistant Store Manager, and Jon Burgher, a Paint and Stain Specialist, from United Lumber in Barrie.
Having seen amazing results that have truly transformed backyards for homeowners, Diane explains, “I would definitely say staining a deck/fence is a do-it-yourself job for most people. Following some quick guidelines you can achieve beautiful results.”
1. Prepare The Surface
Before you start staining, you want to be sure the wood is clean, dry, and free from any debris.
While this can be an intensive first step, it is critical for a long-lasting finish. Diane shares, “I know everyone has heard it 100 times but prep is everything! The extra time spent sanding, cleaning ect will produce a job well done and only enhance your backyard oasis.”
Jon explains that the amount of work involved depends on the age of the deck or fence. “But commonly, prep work would involve light sanding with a 60 or 80-grit sandpaper, along with a mildew remover and a deck cleaner/brightener.”
Mildew removers, like Natura Mildew Off, help remove any signs of mold, mildew, or algae.
For surfaces that just need a quick cleaning and prep, products like Wood-Shield Wood Restorer can be very effective.
“This is a cleaner and brightener that will remove mill glaze, moss, and dead wood fibers from the weathered wood. It is a fantastic product that is biodegradable as well,” Diane explains.
If your deck or fence has been previously stained or painted, it’s best to remove the old paint or stain.
Jon says, “It is always recommended to do a light sanding followed by a cleaning before painting over old paint, to ensure adhesion ... This will make sure the wood is well protected.” For stuck-on paint and stain, you can use a stripping solution, like Natura Safe Strip, to speed up this process and reduce the amount of sanding needed.
2. Choose The Right Stain
Selecting the appropriate stain is crucial for achieving the desired results. Consider factors such as the type of wood and the level of protection you want. You also want to consider your preferred finish and the type of stain you are using.
You have a few different options for finishes.
The first is a waterproof clear coat (transparent finish). These stains will let the natural beauty of the wood shine through and are a great option for new decks. They do, however, provide the least amount of protection against the elements.
The second option is semi-transparent. With these stains, you'll still see the natural grain and characteristics of the wood but you'll have more control over the final colour. You also receive more UV protection with semi-transparent stains than clear coats though they aren't the most protective.
The final option is solid stains. These stains hide the wood grain but come in 1000s of colours and offer more protection than both transparent and semi-transparent stains. That makes them a great option for older decks that are more susceptible to UV damage because the pressure treatment has worn away.
When it comes to the type of stain you're using, there are three common types of stains are:
- Oil Stains
- Acrylic Stains
- Acrylic/Alkyd Hybrids
OIL STAINS
Oil-based stains have been a popular choice for many years and are known for their durability.
Oil-based stains contain a combination of natural oils and synthetic resins. They penetrate deeply into the wood fibers, nourishing and protecting the material from within. This helps to enhance the wood's natural beauty and provides long-lasting protection. The flip side to this is that it is harder to clean up oil-based stains, though mineral spirits can be a huge help.
Other benefits of oil stains are that they add a rich and warm color to the wood, highlight the natural grain and texture, and offer good UV protection.
Over time oil stains will fade but because they don’t peel or flake, adding a new coat can be applied without the need for extensive sanding or stripping.
ACRYLIC STAINS
100% acrylic stains are water-based that are made with acrylic resins. As a result, these stains lay on top of the wood, instead of penetrating it.
Unlike oil stains, acrylic can be easily cleaned up with water, making them more user-friendly and environmentally conscious. They also have a faster drying time compared to oil-based stains.
Acrylic offers excellent color retention, keeping your decks and fences vibrant and fresh-looking for an extended period. While many products are resistant to fading, peeling, and cracking, they will chip away over time.
ACRYLIC/ALKYD HYBRIDS
Acrylic/alkyd hybrid stains combine the best qualities of both oil and water-based stains. They are formulated with a blend of acrylic resins and alkyd resins. This combination of acrylic and alkyd resins creates a highly durable stain that offers excellent resistance to wear, weathering, and UV damage.
Hybrid stains come in a selection of vibrant and rich color options, enhancing the natural beauty of the wood. They also clean up with water like 100% acrylic, provide good colour retention, and are environmentally friendly.
These stains are also easy to apply, offering smooth and even application while ensuring consistent coverage and reduced likelihood of brush or roller marks.
Ultimately the stain you choose will depend on your personal preferences. Jon personally prefers oil-based stain “as it tends to last longer and protect better than the alternatives.”
Diane likes 100% acrylic for siding, fences, and decks. But she also talked to us about a tung/linseed oil stain that can be tinted or used clear, which she says can create a very rich finish, especially on cedar.
3. Test The Stain
It may seem like an unnecessary step, but the importance of testing your stain before diving in can’t be overstated.
Jon explains that this is especially true if using a semi-transparent stain. That’s because stain colours can be altered by the type of wood you put it on. While the stain may be exactly what you want on pine, it may look entirely different on cedar.
Testing on an inconspicuous area will help you ensure that the color and finish match your expectations.
PRO TIP: Remember that colours will look different in full light or shade, so be sure you test your colour where you can see it in different lighting.
In addition, not all stains work well with every type of wood. Some wood species may absorb stains differently, resulting in uneven coloration or an unnatural appearance. Testing the stain on a small section allows you to evaluate its compatibility with your particular wood type. This way, you can make any necessary adjustments or choose a different stain if needed.
Testing the stain also provides valuable insights into how the wood absorbs the product and how long it takes to dry. Different wood types have varying absorption rates, and humidity levels can affect drying times. By observing how the stain behaves during the testing phase, you can estimate the amount of stain you'll need and plan your staining schedule accordingly.
4. Wait For Good Weather
When you’re ready to stain your deck, be sure to watch the weather forecast.
“The weather dictates so much when staining and will factor into the results,” Diane explains. She suggests that you look for a day that is at least 10 degrees for a 24-hour span with low humidity.
You also want to avoid staining your deck or fence in direct sunlight.
While it may be tempting to take advantage of a sunny day to tackle your staining project, there are several reasons why it's important to choose the right time and avoid direct sunlight.
The biggest reason is that direct sunlight can cause the stain to dry too quickly, leading to uneven absorption into the wood.
When the stain dries rapidly, it can result in patchy or streaky areas on the surface, compromising the overall appearance of your deck or fence. By staining in the shade or during cooler hours of the day, you allow the stain to penetrate the wood more evenly, ensuring a uniform and attractive finish.
Other issues you may experience are tackiness, bubbling or blistering, and difficulty spreading the stain.
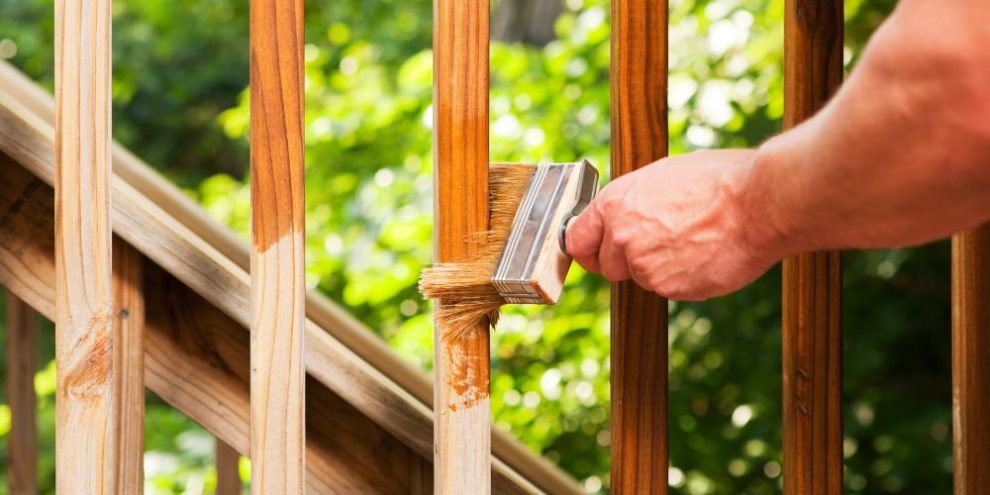
5. Use the Right Tools
The tools you use to stain your deck or fence can greatly affect the final result.
When it comes to applying the stain, Jon and Diane agree that a high-quality brush is key. While you can use a roller or sprayer for your application, they come with drawbacks.
“With a roller, you risk bubbles forming in the applied stain. With a sprayer, you risk areas with too much or too little stain,” explains Jon.
Diane continues, adding, “I 100% agree with Jon to use a stain brush. Any deck or fence I have stained I have always used a brush and achieved great results.”
If a staining brush just isn’t an option, Diane recommends a staining pad. “ This is a great tool for decks because you are able to stand up applying it while still pushing the product into the wood.”
Other tools and supplies you may want to have on hand in addition to prep supplies and an applicator include:
- Drop clothes or plastic sheets to protect surrounding areas (this is especially important when using oil stains, which can be hard to clean up)
- Personal protection equipment like gloves, safety glasses, and a mask
- Stir sticks to keep your stain well mixed throughout the application
- Rags for wiping or blending excess stain
- Ladder or extension poles for getting to hard-to-reach places
RELATED: Creative deck ideas to enhance your outdoor space ...
6. Apply Your Stain The Right Way
To make sure you get a consistent finish, there are some general rules you should follow when applying stain.
Always start by stirring the stain thoroughly. This will help mix the pigment so that the colour is evenly distributed. Dip the brush into the stain, allowing it to absorb an adequate amount without excess dripping.
When applying the stain, work from top to bottom. This will prevent drips or stains on areas that have already been painted. You also want to apply the stain in the direction of the wood grain. This helps the stain penetrate the wood fibers more effectively and results in a more uniform finish.
Avoid oversaturating the wood, as this can lead to uneven drying, inconsistent colour, drips, and other issues.
Finally, as you move around your deck or fence, work in manageable sections, such as one or two boards at a time. You also want to be sure to overlap each stroke with the previously stained area. Both these steps will help prevent visible lap marks.
7. Allow It To Dry Properly
After you are done staining your deck or fence, you must give the stain time to dry according to the manufacturer's instructions.
This means you have to refrain from touching, walking on, or placing objects on the stained surface during the designated dry time. The specific drying time can vary depending on factors such as temperature, humidity, and the type of stain used.
Generally, dried stain will no longer feel wet or tacky to the touch. It will have a solid, dry texture that indicates the solvents have evaporated, and the stain has formed a protective barrier on the wood. This ensures that the stain has adhered properly and will provide the desired color, finish, and durability.
By allowing your fence and deck stain to dry thoroughly, you ensure that the stain achieves its optimal performance, including resistance to wear, UV damage, moisture, and other environmental factors.
It also helps prevent damage or disruption to the stain's surface, such as scuffs, imprints, or peeling, which can occur if the stain is disturbed before it has fully dried and cured.
Keep Your Decks Looking Great
Staining your deck or fence is not a one-time task.
To keep your decks and fences looking their best, it's important to perform regular maintenance. This includes:
Cleaning
Regular cleaning is essential to remove dirt, debris, mildew, and other contaminants that can accumulate on the surface of the wood.
Most of the time sweeping should suffice. But sometimes the debris may be a little more permanent.
For more difficult spots, use a gentle cleanser specifically formulated for outdoor wood surfaces and follow the manufacturer's instructions. Use a hose to rinse off the surface. If using a power washer, make sure it is on a low setting to avoid damaging the stain.
Rinse thoroughly and allow the surface to dry completely before proceeding with any other maintenance tasks.
Inspection and Repairs
Periodically inspect your deck or fence for any signs of damage, such as cracked or splintered boards, loose fasteners, or areas where the stain has worn off. You also want to look for signs of rot, insect infestation, or other structural concerns.
Address these issues promptly by repairing or replacing damaged components. Sand rough spots or splinters and ensure the surface is smooth and safe.
You also want to trim any overhanging vegetation that may impede airflow or promote moisture buildup.
Reapplication Of Stain
Over time, the stain on your deck or fence will naturally fade or wear away due to exposure to sunlight, weather conditions, and foot traffic.
To maintain the appearance and protection of the wood, plan on reapplying the stain at regular intervals. This is typically every 2 to 3 years, although this can vary depending on factors such as the stain type, climate, and level of wear.
Before reapplying, clean the surface thoroughly, sand if necessary, and ensure it’s dry. Follow the stain manufacturer's instructions for proper application techniques and drying times.
Staining Wood Your Deck And Fence
A well-maintained wood deck and fence will not only elevate the beauty of your home but also provide a welcoming and enjoyable environment for you, your family, and your guests to cherish for years to come.
By following these tips, you'll be well-equipped to tackle your next staining project with confidence.
RELATED: Ideas, tips & inspiration for your next home renovation or DIY project ...